Viewing and exporting your leads
Where to find every lead delivered to you, how to search and filter the list, and how to download it as a CSV.
4 min read
Before you start
- At least one lead delivered on a Premier order
Tip
Click any column header to sort the list, which starts out newest first.
Every lead from a Premier order lands on one page, Leads in the left sidebar. Leads you buy in Premier Overflow or the Warehouse are on that order's own page, and in the export below. This article covers reading the list, opening a lead, and getting your leads out as a spreadsheet.
The list
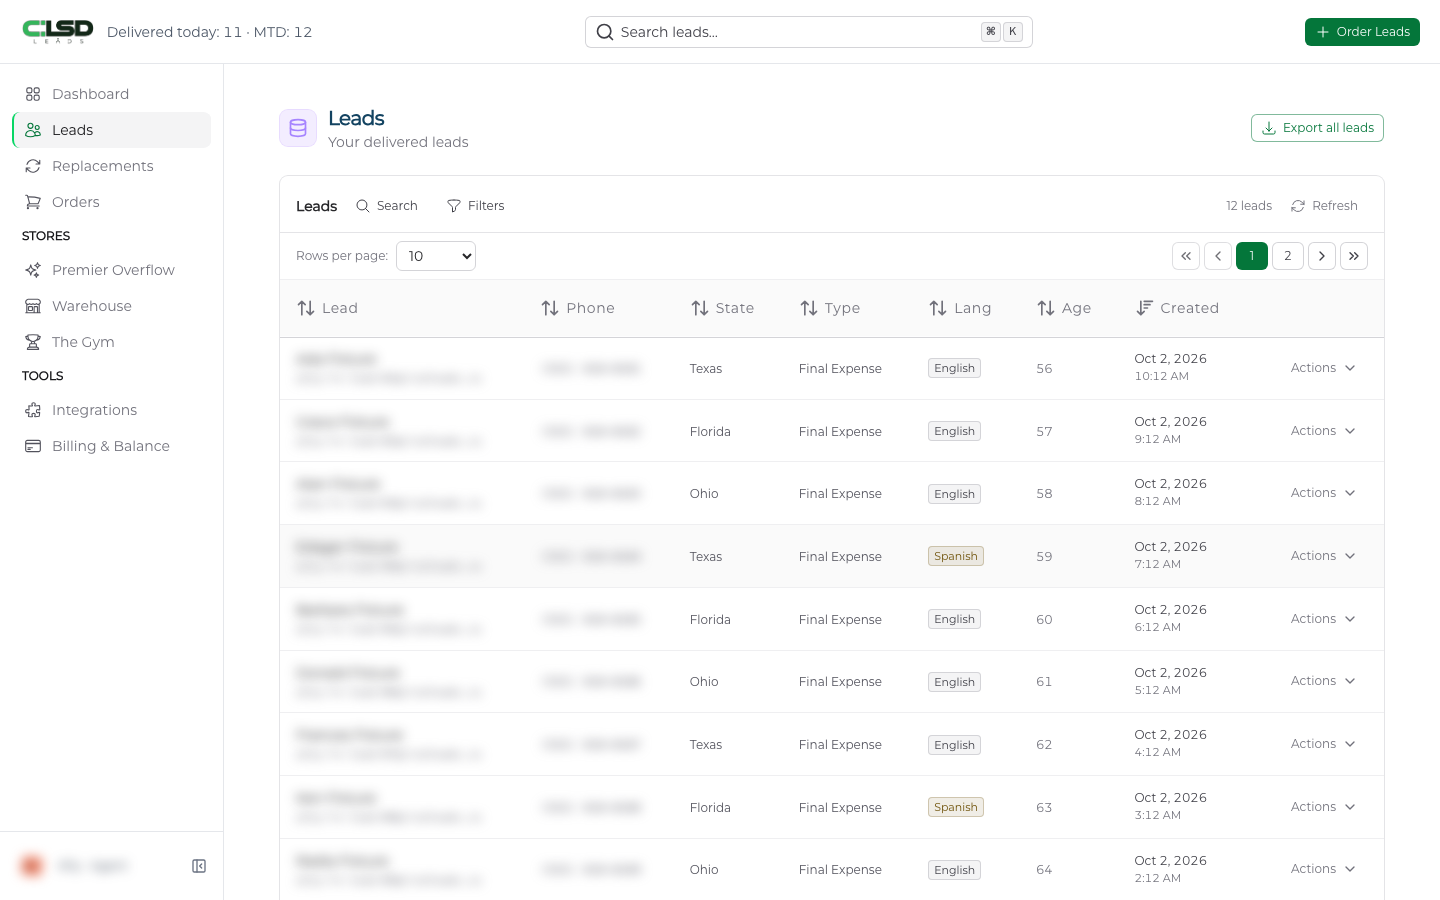
Each row is one delivered lead. The columns are Lead (the name, with the email address underneath), Phone, State, Type, Lang, Age and Created, with an Actions button at the end of each row, in a column with no heading.
Important
Created is the date and time the lead was delivered to you, not the moment the person filled out the form. Your replacement window counts from that date.
Searching and filtering
To search, click Search above the table or press ⌘K on a Mac and Ctrl K elsewhere. Type a name, email, phone number or state and choose Filter this list for it. The term shows as a chip in place of the Search button while it is active, with an x to remove it. Click Filters to narrow by State, Type, Language, Age Range, Created From and Created To. Clear removes every filter at once.
Opening a lead
Step 1. Open the lead panel
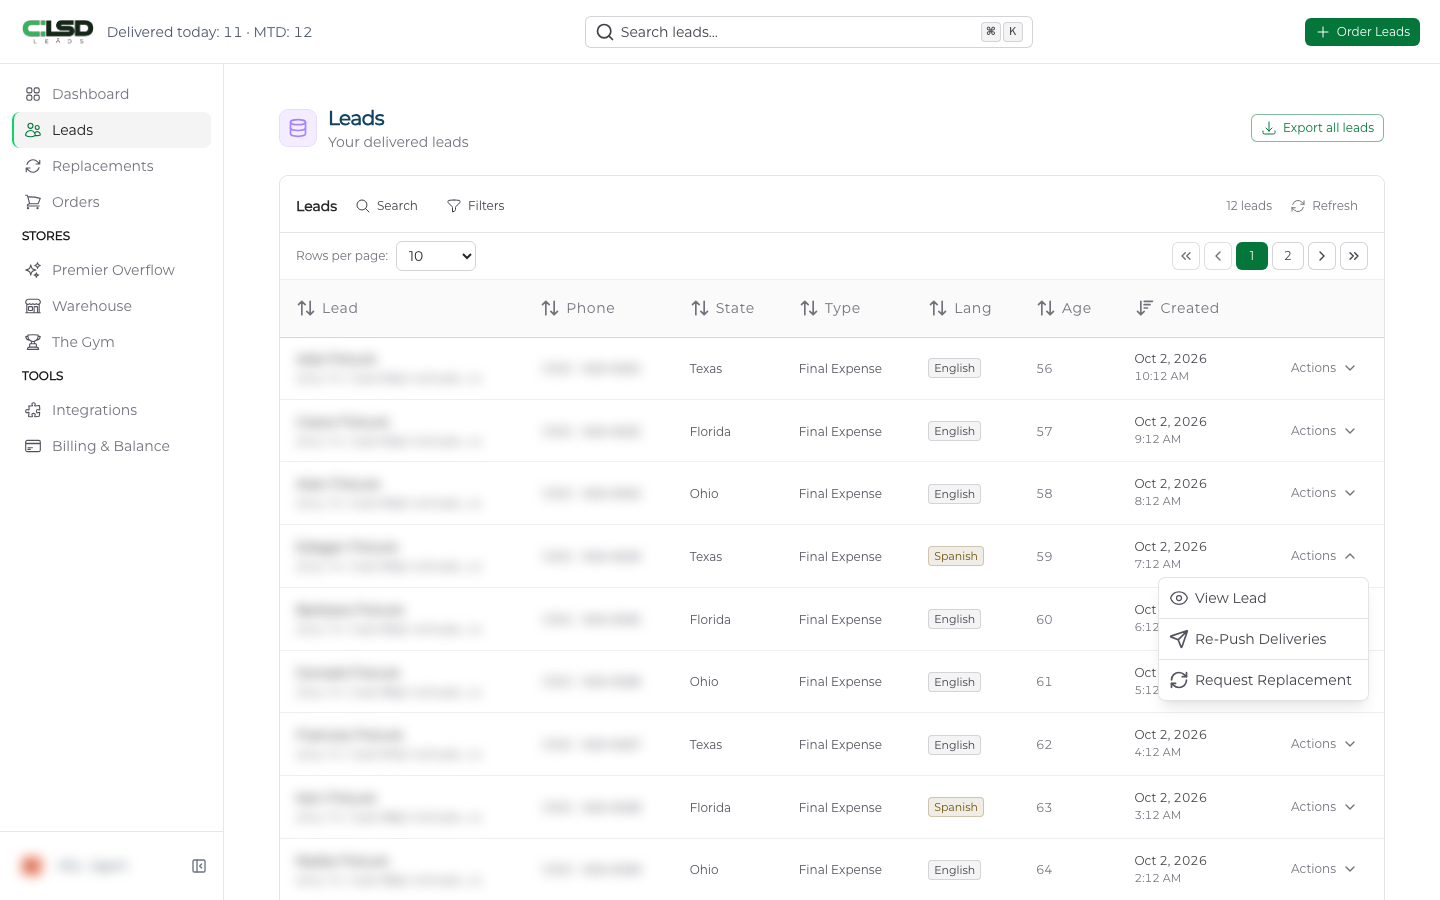
Click Actions on a row and choose View Lead. A panel slides in with everything we have on the person. Contact Information holds the first name, last name, email and phone. Demographics holds age, state, type and language. When the person answered them, Additional Details shows Beneficiary, Hobby, Purpose of Coverage, Amount of Coverage, Timeline and Current Coverage. If you have asked for a replacement on this lead, a Replacement Request section shows its status and reason.
Step 2. Use the other two Actions entries when you need them
- Re-Push Deliveries. Sends this lead again to any of your delivery methods, for example after you connect a new CRM. Pick the method and click Push, or Push All to send it to every method on the order.
- Request Replacement. Opens the replacement form. Once a request is on file the entry reads Replacement requested, then Replacement approved or Replacement denied once CLSD decides, and it cannot be clicked again. See Requesting a replacement.
Downloading a CSV
Click Export all leads at the top right of the Leads page. You get a file called leads.csv with one row per lead and these columns. First Name, Last Name, Phone, Email, Created, Amount, Timeline, State, Beneficiary, Purpose, Age, Hobby, Current Coverage and Purchased At. The file is sorted with your most recent leads first, and it includes your Premier Overflow and Warehouse leads as well.
To export one order on its own, open the order from Orders and click Download CSV at the top right. That file has the same columns without Purchased At. Premier Overflow and Warehouse orders also have Download CSV in their Actions menu on the Orders list.
Note
In the file, Created is when the lead itself came in and Purchased At is when it was delivered to you. On the Leads page, Created means the delivery time.
Troubleshooting
The Leads page says No leads available
Leads appear once your order is being fulfilled. If the order still shows Scheduled on Orders, nothing has been delivered yet. See How leads arrive over time.
A lead never reached my CRM or inbox
Click Actions on the row and choose Re-Push Deliveries. Pick the method and click Push, or Push All to send it to every method on the order.
Where are my Premier Overflow and Warehouse leads?
They are on that order's own page. Open it from Orders with View Order. They are also in the file from Export all leads, which covers every lead delivered to you.
Why can I not click Request Replacement on a lead?
A request is already on file. The entry reads Replacement requested, Replacement approved or Replacement denied depending on where it stands. See Requesting a replacement.